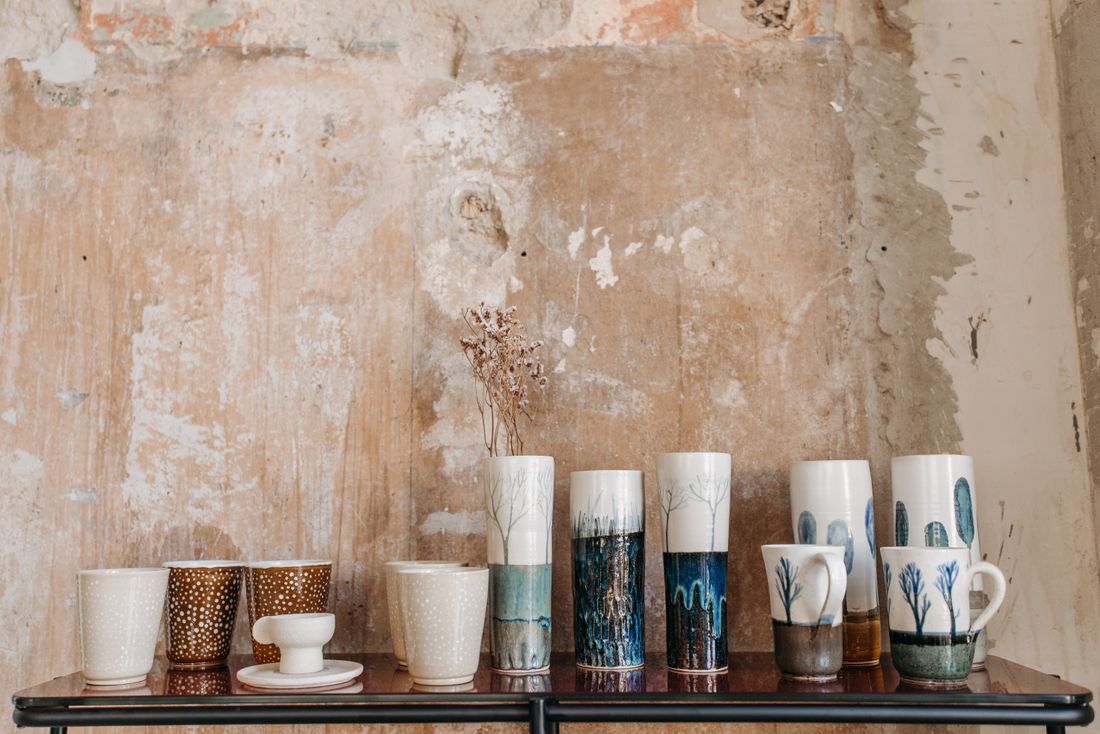
For one weekend a working studio turns into a shop, and the photos have to do something more complicated than document the day. They have to make small, inexpensive pieces look worth carrying home, prove the room was worth showing up for, and still leave the artist's larger practice standing behind all of it, in focus, not buried under a table of ornaments and prints.
A holiday studio sale's photography plan needs two clear passes, not one long scramble: a quiet pre-doors shoot for staged product and room shots, then a separate crowd pass once the sale is underway. Small, price-point work gets photographed with the same discipline as any larger piece, price tags stay out of frame, and the artist's bigger work stays visible in the background so the sale reads as one weekend inside a real practice, not the whole of it.
What Two Jobs Do the Photos From a Holiday Studio Sale Actually Have to Do?
A holiday studio sale's photos do two jobs at once: sell the work still on the table this weekend, and build the invite list and social proof that gets people back next December. Treating it as one job produces images that do neither well, because a sale photo and an invitation photo want different things from the same room.
The sell-now job is close and immediate. A shopper scrolling a story an hour before closing wants to see a specific piece, its scale against a hand or a shelf, and whether it looks finished rather than leftover. Those photos work fast, get posted the same day, and mostly expire once the sale ends.
The build-next-year job is slower and quieter. It is the wide shot of a full table, the studio lit warm at dusk, the line of people waiting to pay. Nobody buys from that photo in the moment. It gets saved for the email or the flyer that goes out eleven months later, when the point is proving the event is worth clearing a Saturday for.
A sale that only shoots product misses the room entirely and has nothing to advertise with next year. A sale that only shoots atmosphere never gives anyone a reason to click through and buy something today. Planning for both from the start, rather than discovering the gap afterward, is the difference between one usable set of photos and two half-finished ones.
How Do You Photograph Small, Price-Point Work Without Making It Look Cheap?
Small, price-point work photographs well with the same discipline as any other piece: clean surface, consistent light, and a scale reference that shows size honestly, whether that is a hand, a coin, or a known object nearby. The mistake is treating small work as a photography afterthought because it is priced like one.
A card or print sitting flat on a table photographs differently than a framed piece hanging on a wall, and it needs its own setup rather than a rushed phone shot squeezed between bigger sales. A plain background, even light with no harsh shadow across the surface, and a straight-on angle keep the piece legible instead of leaving a shopper to guess what they are actually buying.
Grouping several small pieces together for one photo can work, but it should look chosen, not dumped. A handful of ornaments or small prints arranged with visible space between them reads as curated. The same pieces piled together to save time reads as a clearance bin, and that impression follows the work even after it is priced fairly and made carefully.
The goal is not to make small work look expensive. It is to photograph it with the same respect given to a larger piece, so a shopper trusts that a modestly priced print and a much larger painting came out of the same studio and the same standards, just at a different size.
What Is the Crowd-Versus-Product Timing Problem, and How Do You Solve It?
The crowd-versus-product timing problem is that clean, legible product photos and lively, well-attended crowd photos rarely happen in the same hour. A full table looks great with no people around it, and a shot proving the room was busy usually has someone's shoulder blocking the piece that needed to sell. Solving it means shooting in two clear passes, not one continuous scramble.
The first pass happens before doors open or right at opening, when the table is fully stocked and nobody has picked through it yet. This is the window for clean, individual shots of the work itself, since an hour later half of what was photographed may already be sold or rearranged by browsing hands.
The second pass happens once the room fills in, and it is not trying to photograph products anymore. It is photographing energy: people leaning over a table, a line near the register, conversation at the door. Trying to get a clean product shot during this window usually means waiting for a gap that never quite arrives.
Knowing which pass is which in advance, rather than trying to catch both in the same frame all afternoon, is what keeps a sale from ending with either a folder of empty-room product shots or a folder of crowded photos where nothing is actually visible enough to sell. A short, deliberate return to the table midway through the day, once a natural lull opens up, can also catch a partially picked-through table looking tidy again, which is a useful middle option between the two extremes.
What Should Get Photographed Before the First Buyer Walks In?
Before the first buyer walks in, photograph the room exactly as staged: full tables, clean arrangement, natural light or the day's actual lighting setup, and no gaps where something has already sold. This is the only window where the room looks intentional rather than picked-over, and it rarely lasts past the first hour.
A staged, pre-doors room is the version most useful for both jobs at once. It is clean enough to use as a product shot of individual pieces, and it is complete enough to use later as the wide, inviting version of the space for next year's promotion. Once buyers arrive, that completeness disappears piece by piece.
It is worth photographing the setup from more than one angle: a wide shot of the full table or wall, a few medium shots grouping pieces by type or price, and close details of anything with texture or craftsmanship that matters at scale, such as a hand-thrown edge or a print's paper stock. These are also the shots that hold up as documentation of the work itself, separate from the sale entirely.
This window is short and does not repeat. Once the first customer arrives, the room starts changing in ways that cannot be reset, so the pre-doors pass deserves the same seriousness as any other planned shoot, even though it is happening on what still looks like an ordinary morning before an event.
How Do You Keep an Artist's Larger Practice Visible in a Room Full of Small Work?
Keeping an artist's larger practice visible means photographing the studio walls, in-progress pieces, and any large-scale work still on view alongside the price-point table, so the small, affordable pieces read as one part of a bigger practice rather than the whole of it. A room full of only small items tells an incomplete story.
A holiday sale table is often the least representative sample of what an artist actually makes, since price-point work exists partly to be accessible and portable. Photographing only that table risks leaving a viewer with the impression that the small, inexpensive pieces are the artist's main output, when they are usually a side offering built around a larger, more ambitious practice.
The fix is simple framing rather than a separate shoot: a wide shot that includes the sale table in the foreground with a large canvas or sculpture visible on the wall behind it, or a few frames of the studio's working space, unfinished pieces included, shot the same day. None of this needs to be elaborate, just present in the same set of photos as the sale itself.
This matters most for the invite-list job described earlier. Someone deciding whether to visit next year is not just weighing whether the ornaments were nice. They are getting a read on the artist's whole practice, and a photo set that only shows small work undersells exactly the thing worth returning for.

How Should the Room Be Styled and Shot So It Feels Like a Studio, Not a Market Stall?
A studio sale reads as a studio and not a market stall when the styling stays close to how the space normally looks: real work surfaces, natural materials, a few deliberate additions like a runner of fabric or simple risers, rather than folding tables, plastic bins, and clip-on signs borrowed wholesale from a craft fair.
Simple staging choices carry a lot of weight in photos. Grouping pieces by size or color rather than spreading everything flat in one long row gives the table visual rhythm. Slight height variation, using a box or a stack of books under a cloth to lift a few pieces, keeps a photo from reading as one flat surface of merchandise.
The room itself should still look like a working studio in the background: tools, materials, or unfinished pieces visible rather than cleared away entirely. That backdrop is what separates a studio sale from a table set up anywhere else. Clearing every trace of the practice out of frame to look more like a retail shop usually makes the photos less distinctive, not more professional.
None of this requires elaborate styling or a stylist on-site. It mostly means resisting the instinct to over-organize into rows and grids, and instead keeping the arrangement close to how the work actually gets made and handled, which tends to photograph as more considered than a picture-perfect market display ever does.
What Product-Style Shots Does Each Piece Need for Follow-Up or Online Sale?
Each piece worth selling after the weekend needs a consistent, repeatable shot: same background, same light, a fixed angle, with the piece filling most of the frame and nothing else competing for attention. That consistency is what lets leftover inventory move to an online listing or a follow-up email without a second shoot.
A sale weekend is a poor moment to improvise documentation, since pieces are moving fast and light changes across the day. The more reliable approach is a small fixed setup off to the side, even a single table against a plain wall with consistent daylight or a simple lamp, where anything not sold gets photographed the same way in under a minute per piece.
Consistency matters more than polish here. A buyer scrolling a follow-up post comparing several prints wants to judge them against each other fairly, which only works if they were all shot the same way. A set where one item is warmly lit on a table and another is a dim phone photo from across the room undersells whichever piece got the worse treatment, regardless of the actual work.
This step is easy to skip in the moment because the room is full and busy, but it is what turns a weekend of in-person sales into weeks of continued online sales afterward, without needing to schedule a separate documentation day once the excitement of the event itself has passed.
How Do These Photos Get Reused After the Weekend Is Over?
After the weekend, these photos get reused across an email recap to the mailing list, a save-the-date graphic for next year, social posts spaced out over the following weeks, and sometimes a printed postcard or flyer for the next event, so the sale keeps working long after the last piece is wrapped and paid for.
Many artists send one thank-you post the week after and then let the entire photo set sit unused until the next sale rolls around. That is where most of the value gets left on the table. A wide room shot from opening morning, held for eleven months, becomes the exact image that anchors next year's announcement, when nobody remembers the day-of hustle but everybody responds to a warm, full room.
Organizing the take before moving on makes this easier later: separating the pre-doors staging shots, the mid-sale crowd energy shots, and the individual product images into clearly labeled folders means next year's promotion does not require digging back through hundreds of unsorted photos to find the two or three that actually work.
Treated this way, a single weekend's photography becomes a full year of usable material rather than a one-time record of an afternoon, which is the entire argument for planning the two jobs from the opening section before the first table is even set up. A short debrief right after the sale, while the day is still fresh, is usually enough to sort the take into those labeled folders before it gets buried under whatever comes next on the calendar.
Frequently asked questions
Should we hire a photographer for a small holiday studio sale, or is it fine to shoot it ourselves?
It depends on how much the photos need to do afterward. If the goal is a few quick posts during the sale itself, a phone and some care with light and background is usually enough. If the photos need to double as next year's invitation and clean product shots for follow-up sales, a dedicated shoot with a pre-doors staging pass tends to produce a noticeably more usable set.
How many photos do we actually need from one sale weekend?
There is no fixed number, but a useful minimum covers three categories: a handful of wide, staged room shots from before doors open, several individual or grouped product shots with consistent lighting, and a small set of candid crowd images once the room fills. Fewer than that in any one category tends to leave a gap when the photos get reused later, and having a few extra of each gives room to pick the strongest one afterward.
Should price tags or price cards be visible in the photos?
Generally no, or as little as possible. Legible price cards date quickly if prices change the following year, and they clutter a photo that might get reused as a general invitation image later. Keeping tags physically present for shoppers but angled or cropped out of the actual photos preserves the option to reuse the same image well beyond this one sale weekend, without needing a reshoot once prices are updated.
How do we photograph the artist's larger work when the sale table is the main focus of the day?
A few extra minutes during the pre-doors pass is usually enough: a wide shot that includes a large canvas or sculpture in the background behind the sale table, plus a couple of frames of the studio's working area shot the same morning. This does not need a separate session, just a deliberate choice to point the camera at more than the table itself before the room fills with shoppers.
What is the single biggest mistake in photographing a studio sale?
Treating it as one continuous shoot instead of two distinct passes. Trying to capture a clean product shot and a lively crowd shot in the same frame, all afternoon, usually produces neither well. Planning a quiet pre-doors pass for the room and product, then a separate pass once the room fills for energy and atmosphere, solves most of the timing problems this kind of event creates.
One night, two openings, no dropped coverage.
We plan clustered opening nights before they turn into a scramble, whether that means a split schedule, a second shooter, or an early enough booking that the calendar never becomes the problem.
Explore event coverage →